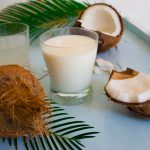
Coconut Milk From Scratch. The Recipe
Simlpe step-by step approach to making your very own delicious coconut milk.
Servings: 4 Cups
Calories: 276kcal
Cost: 2$
Equipment
- hammer
- sharp knife
- kitchen towel
- medium bowl
- Large cup
- Muslin cloth or Nut bag.
- Blender
Ingredients
- 1 Large Coconut
- 3 Cups Water. Hot water is preferred over cold to produce richer coconut milk that had a higher coconut oil content.
Instructions
- Prepare The CoconutRemove as much hair off of the coconut as possible

- Locate The EyesFind the 3 soft 'eyes' of the coconut.

- Drill HolesPierce the soft eyes of the coconut with a butter knife. You will need to pierce two holes (there are 3 in total) for proper drainage.

- Remove LiquidTurn the coconut upside down and drain the coconut water into a cup.

- Give it a Bash.cover the coconut in a kitchen towel and gently knock it against a hard surface. In the knocking action, we will be loosening the coconut flesh from its hard shell layer. This makes our job a little easier in the next step.

- Crack It OpenAfter knocking a few times, start using a bit more force and crack the shell open. Break the coconut up into a few pieces.

- Separate Flesh From ShellThe hardest and most injury-prone step is prying the coconut meat away from its shell, so be careful! With a butter knife, pry the coconut meat from its shell.

- Blend With WaterPlace the coconut flesh in a blender and add one cup of hot water at a time, blending in between.

- Once the coconut and water mixture forms a smooth and creamy slurry, the mixture is ready to sieve (about 3 or 4 cups of water).

- Sieve Through BagPour the coconut mixture through a muslin bag or nut milk bag into a bowl. Squeeze out as much liquid as possible, and transfer the coconut milk to the refrigerator.

- Store in Fridge or FreezerHomemade coconut milk will keep for up to 3 days in the fridge. freeze the milk in ice trays and use coconut milk blocks as needed. Store this way for up to 2 months!
